19 Stunning Twist-Out Hairstyles for Natural Hair
Twist-out hairstyles for natural hair are more than just curls—they’re a whole vibe. This timeless look adds shape, definition, and softness while letting your texture shine through.
From chunky twists that give bold volume to sleek, defined spirals that look photo-ready, twist-outs can flex with your mood, your outfit, and your plans. They work beautifully for short crops, shoulder-length coils, and long stretched curls.
You’ll find styles here that suit protective needs, help retain moisture, and even stretch out shrinkage without heat. Some twist-outs are perfect for low-maintenance routines, while others give glam that lasts for days.
You’ll get creative inspiration, styling ideas, and real-life ways to refresh your look—no salon trip required.
Each hairstyle brings out the best in natural textures, whether you like big volume or a neat polished finish.
If you’re looking for a fresh twist to your everyday routine or something bold for a night out, you’re about to find your go-to.
This guide covers it all—styles with accessories, layered looks, and easy two-strand options you can wear confidently.

1. Classic Two-Strand Twist-Out
The two-strand twist-out is a go-to for natural hair because of its simplicity and reliable results.
Begin with freshly washed, damp hair. Apply a curl cream or butter that gives hold without stiffness.
Part your hair into even sections and twist each one tightly from root to tip. The size of your twists will affect the final curl pattern, so adjust according to your preference.
Let the twists dry completely overnight or sit under a hooded dryer. Once dry, coat your fingers with a light oil and slowly unravel each twist to avoid frizz.
Fluff the roots using a pick or your fingers to add volume. This method delivers defined curls that last several days with minimal effort.
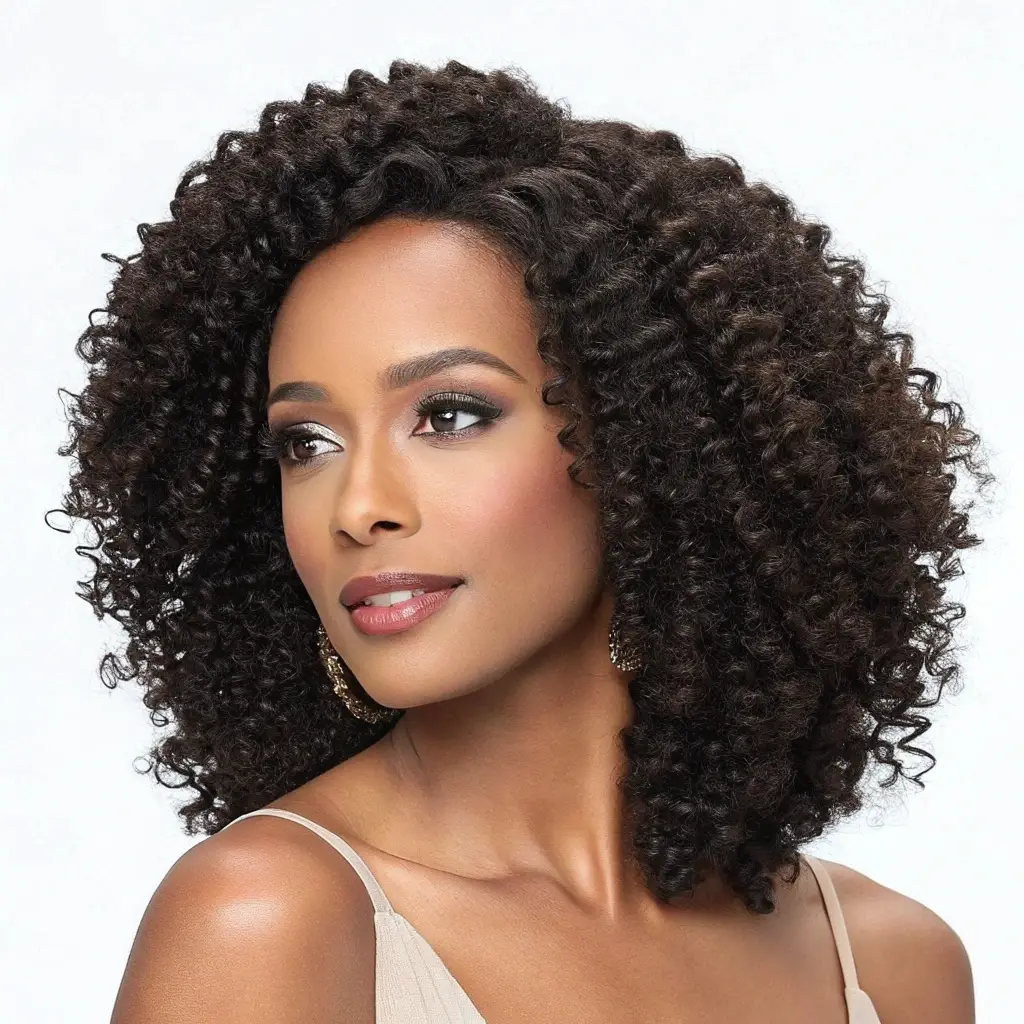
2. Chunky Twist-Out Volume

Chunky twist-outs are the fast track to big, bold curls with plenty of volume. Start by dividing your hair into larger sections—fewer twists mean more body. Use a styling cream that offers moisture and mild hold.
Twist each section snugly, securing the ends with a bit of gel or butter to prevent unraveling. Allow the twists to dry thoroughly before take-down.
Gently separate each twist into two or three pieces to boost fullness. Avoid over-manipulating to preserve definition.
A light pick at the roots gives lift without disrupting curl shape. This technique is perfect for fine strands or anyone who loves volume without spending hours in front of the mirror.
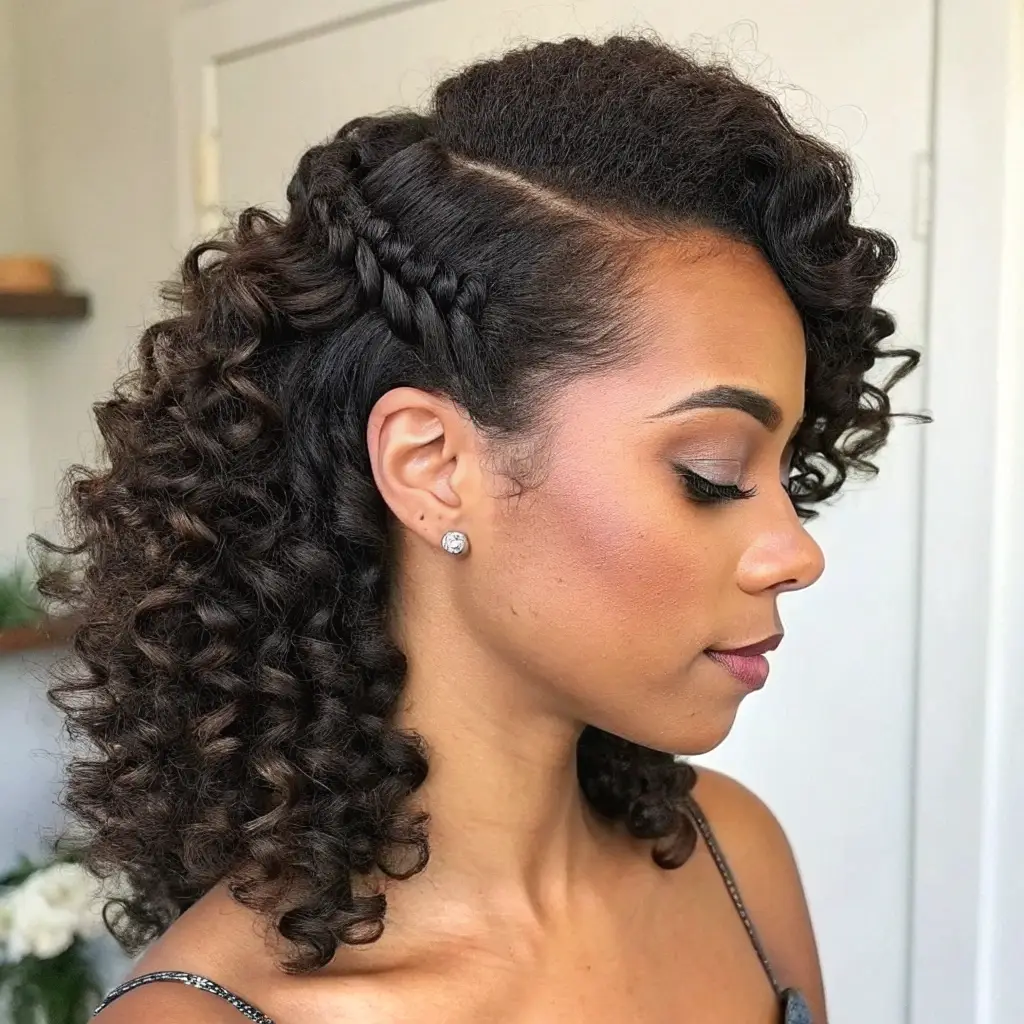
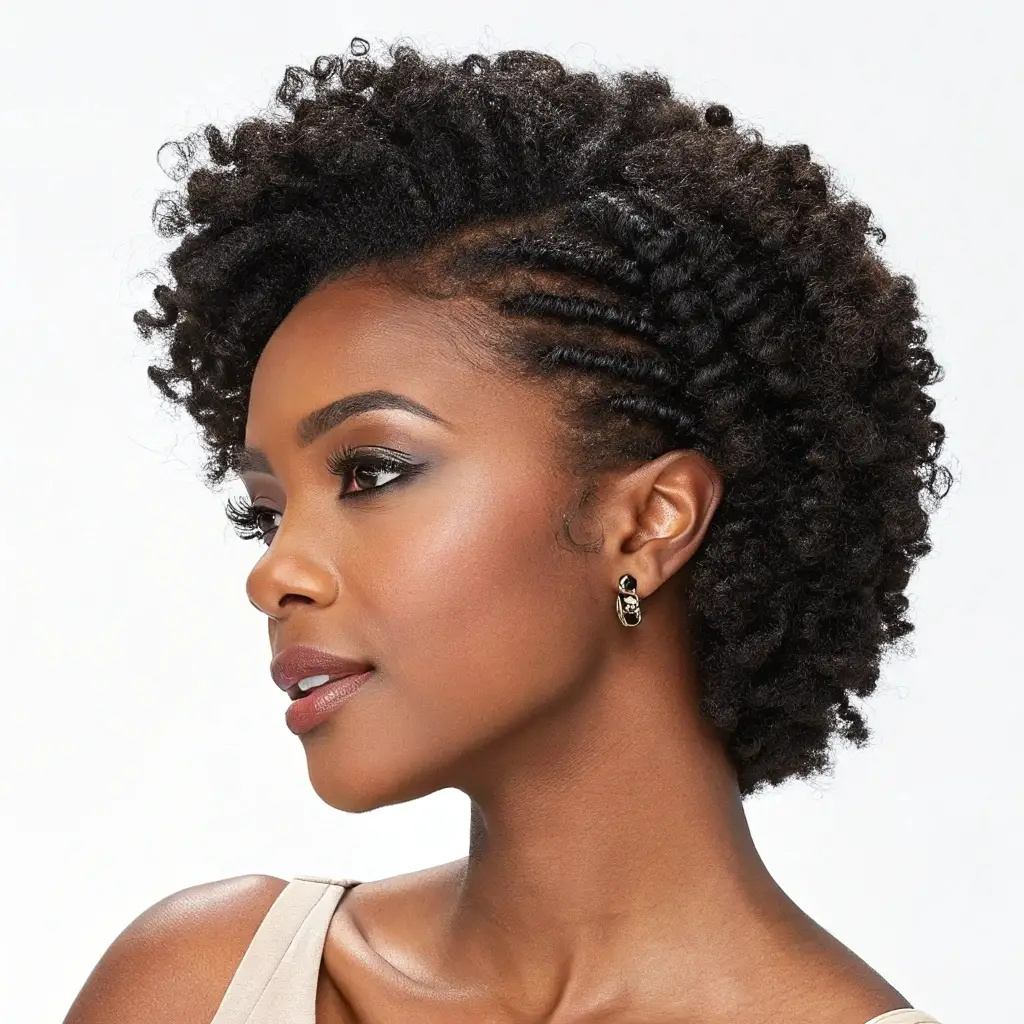
3. Flat Twist-Out Crown
This hybrid look combines the stretch of flat twists with the definition of a twist-out. Start on damp or lightly stretched hair and create flat twists along the sides and front, directing them toward the crown.
At the back, switch to regular two-strand twists. This helps control shrinkage around the hairline while maintaining curl texture.
Once dry, unravel each section carefully, using oil to reduce frizz. The result is a soft, fluffy crown with a sleek, shaped outline.
It’s easy to style and gives your face a natural frame. This look balances structure with volume and can be worn casually or dressed up with accessories.
4. Twist-Out Frohawk
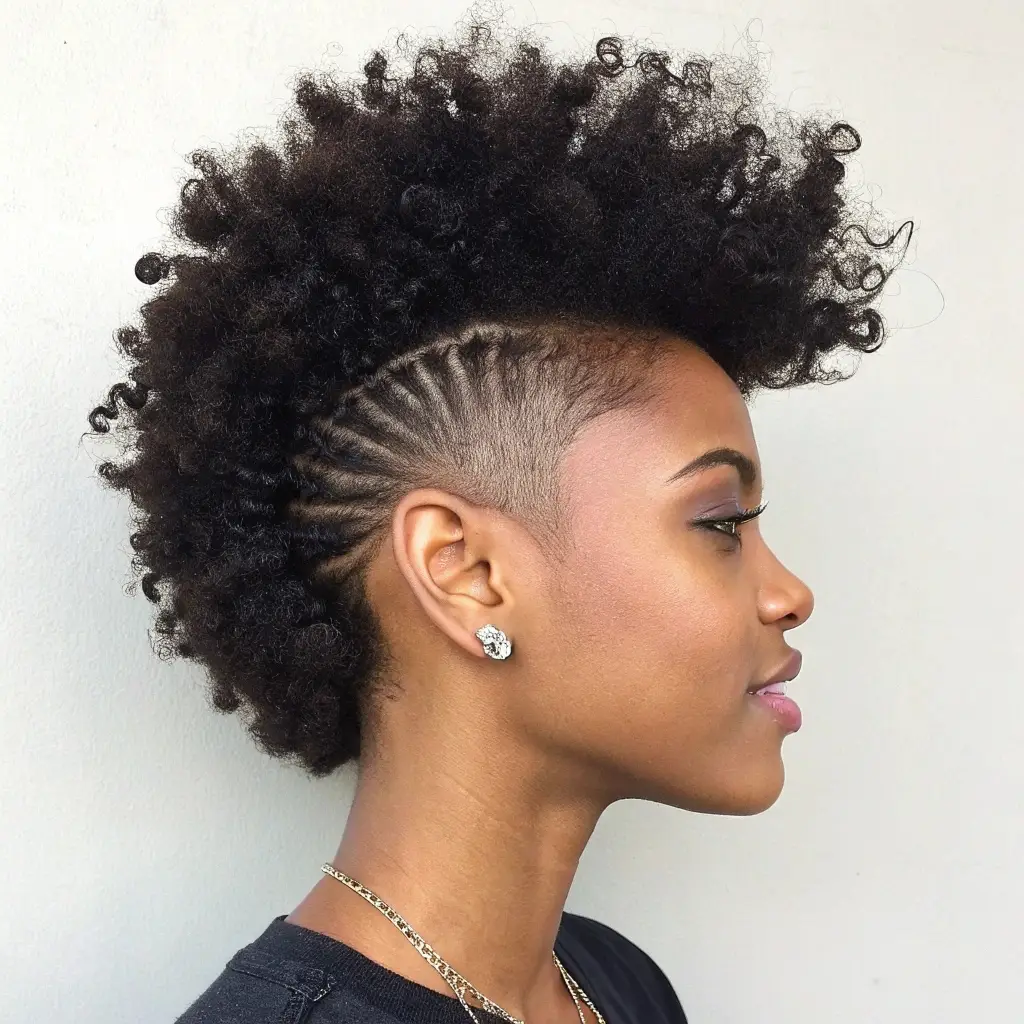
The frohawk twist-out is all about bold structure and edgy style. Begin by parting your hair into three sections.
The sides and a strip down the middle. Twist all parts as usual, making sure each twist is tight and moisturized.
Once dry, pin the side sections upward using bobby pins or clips, leaving the middle section free and fluffy. Separate the middle twists and fluff the roots to add height.
The contrast between the pinned sides and voluminous center creates a mohawk effect that feels both natural and dramatic.
This style stands out and works well for concerts, parties, or any time you want your curls to make a statement.
5. Side-Parted Twist-Out
Adding a side part brings structure and elegance to your twist-out without complicating the process.
On damp or stretched hair, create a deep part on one side before twisting. Work in sections, using a cream or custard that enhances curl definition.
Twist tightly from root to end, and make sure your part stays neat during the process. Once your twists are dry, unravel carefully and fluff.
Let the curls fall naturally to either side of the part. The part creates a sense of asymmetry that flatters most face shapes.
This twist-out variation works beautifully for special events or everyday wear when you want something a little more polished.
6. Twist-Out with Flexi Rod Ends

This twist-out offers extra flair by curling just the ends. After twisting your hair as usual, wrap the tips of each twist around flexi rods.
The rods give a spiral finish that adds bounce and shine. Apply mousse or a styling foam before setting to ensure hold without crunch.
Let the twists dry completely—either air-dry overnight or use a hooded dryer. Remove the rods first, then gently take down the twists.
The curled ends blend into the twist pattern and give movement to your style. This twist-out version creates a soft, romantic effect that works for weddings, date nights, or whenever you want an elevated look.
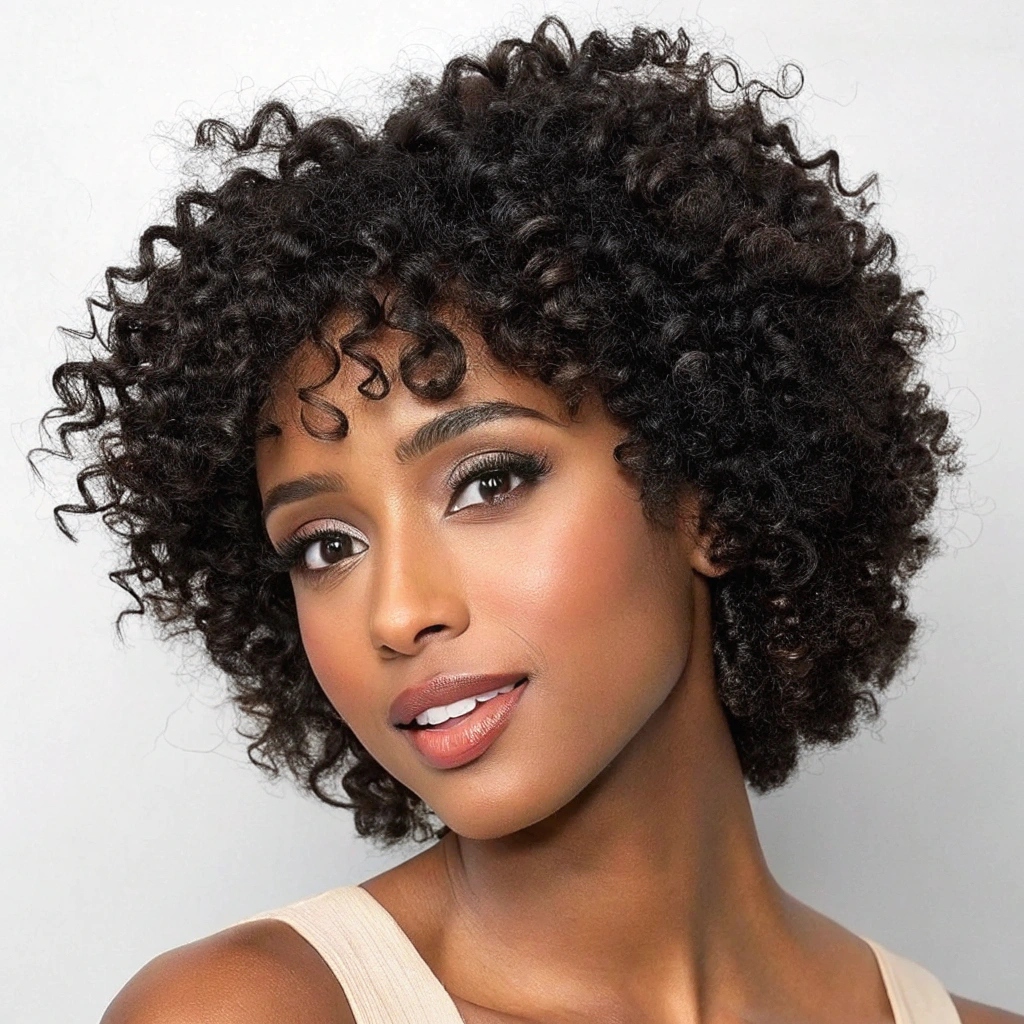
7. Defined Mini Twist-Out
If you crave ultra-defined curls that last all week, the mini twist-out is your best option. Start with freshly moisturized hair and create very small sections throughout.
Twist tightly from the roots to the ends, securing each one with product. Though this style takes more time to install, the results are worth the effort.
Once completely dry, separate each twist once or twice to maintain definition. Avoid over-fluffing to preserve the curl pattern. This style holds its shape longer than chunkier twists and requires little refreshing.
It’s perfect for those who want to set it and forget it for a few days while keeping their curls neat and structured.
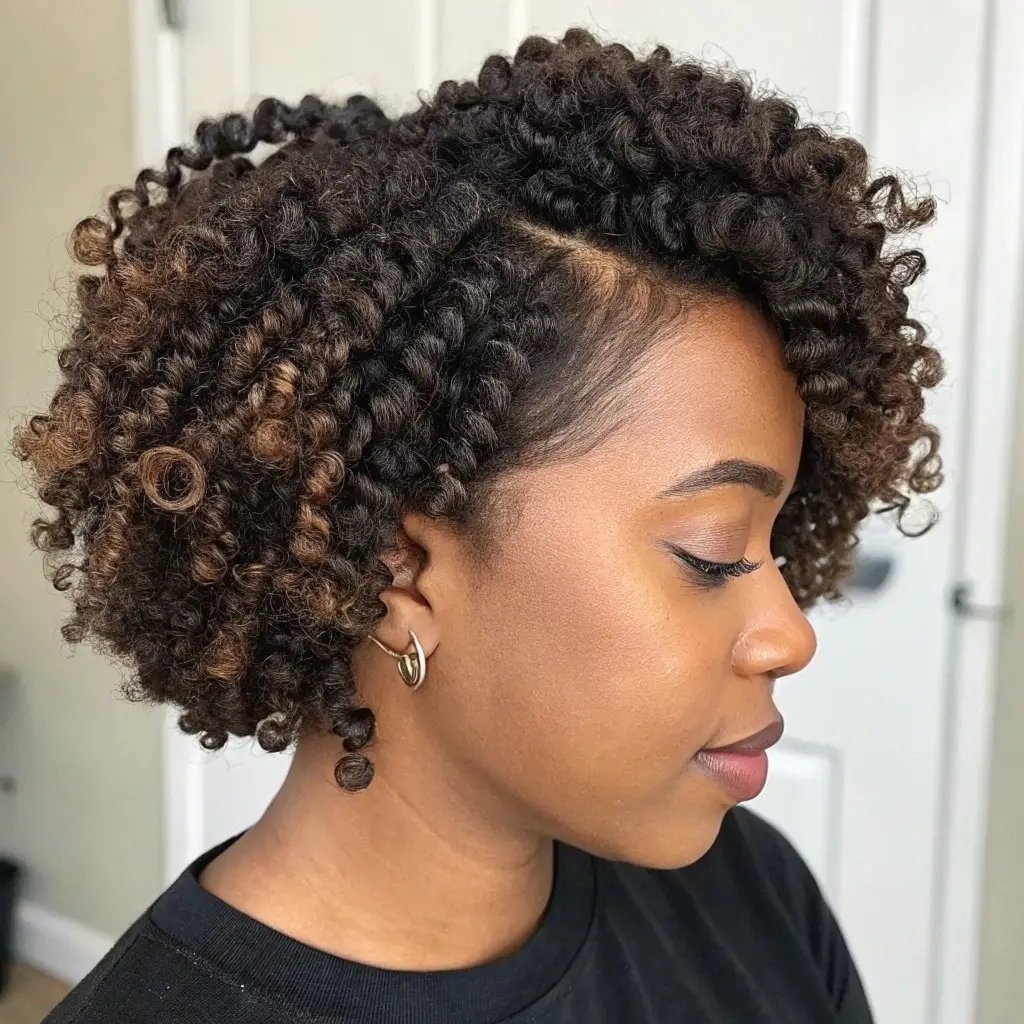
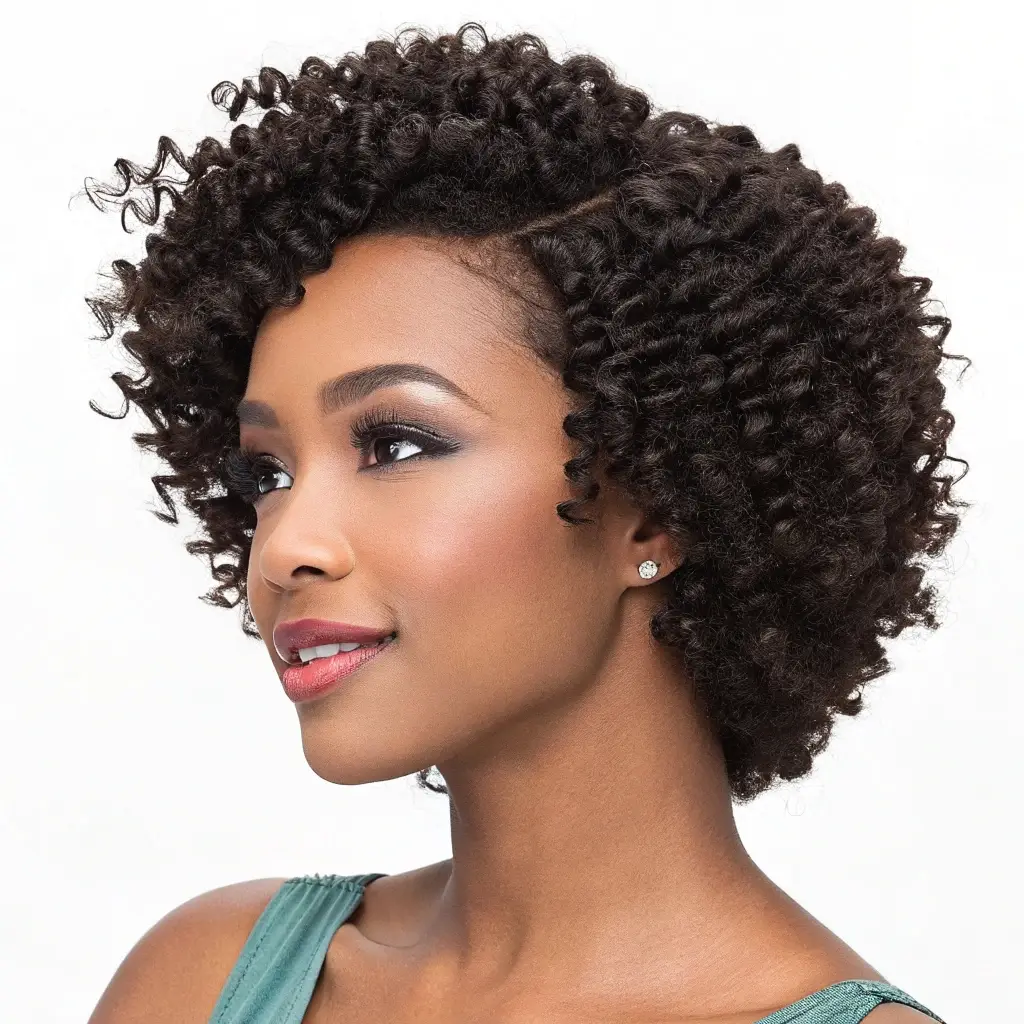
8. Twist-Out Bob Look
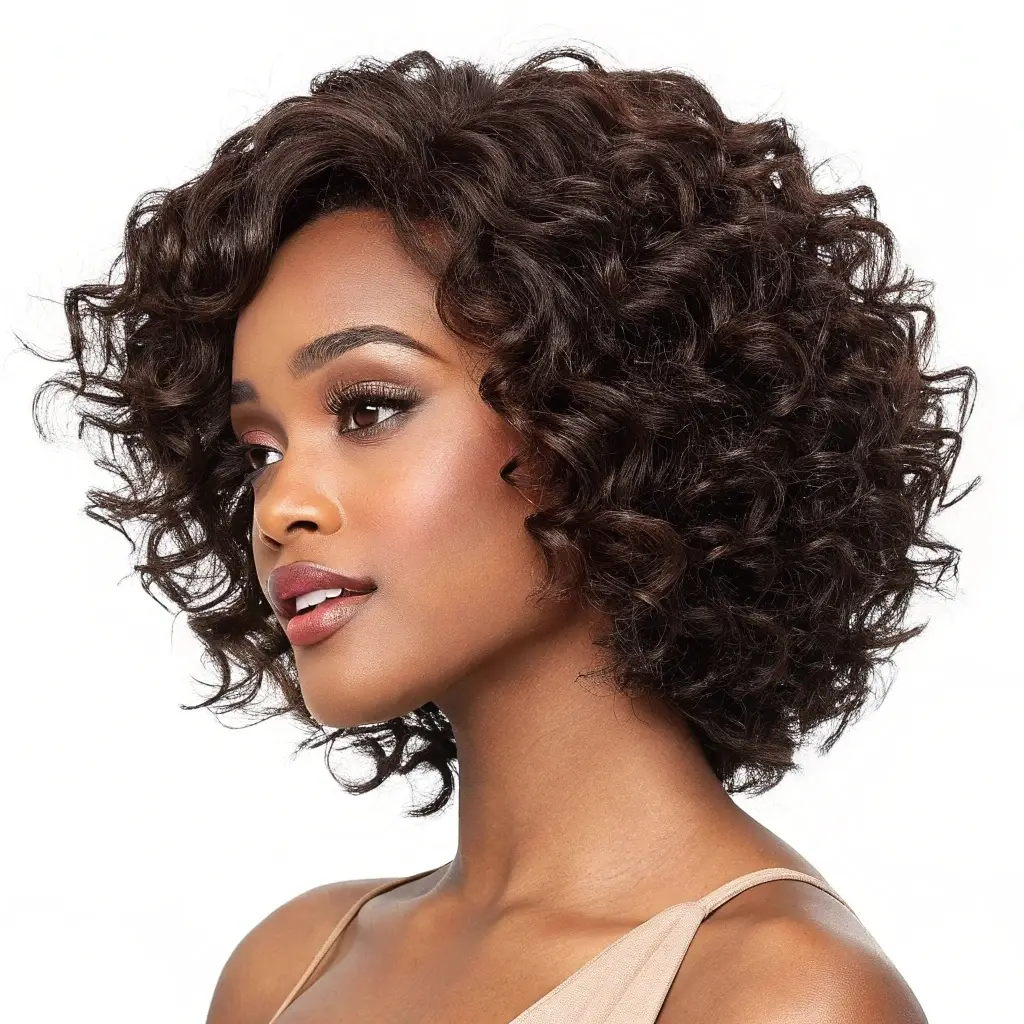
Get the illusion of a bob without cutting your hair by shaping your twist-out with intention. Focus your twisting pattern to create fullness on the sides and slight shrinkage in the back. Use smaller sections at the nape and fluff the front to fall just below the ears.
Once you unravel the twists, shape the curls inward with your fingers. This creates a rounded, chin-length silhouette that mimics a bob cut. The key is twist size and separation technique.
It’s a fun, flirty style that works well on medium-length hair and adds a modern twist to your routine. You can switch up the shape midweek by fluffing differently.
9. Side-Swept Twist-Out

This soft, romantic look comes from directing all your twists at a diagonal toward one side. After washing and moisturizing, begin twisting while pulling each section slightly sideways.
Once your hair is dry, carefully unravel each twist and gently separate the curls. Use bobby pins or a clip to tuck one side behind the ear if needed.
The side-swept finish creates movement and volume where it matters most—around your face.
It’s an effortless update that gives your twist-out a new shape without extra steps. Great for special events or workdays when you want a touch of glam with low effort.
10. Bang-Inspired Twist-Out
You don’t need to cut bangs to enjoy the look of them. This twist-out variation mimics fringe by focusing small twists near the forehead.
Angle the front sections forward as you twist, using curl cream or a twisting butter to help hold shape.
Once dry, unravel those pieces gently and let them fall naturally into your eyes or just above the brow. Fluff the back and sides to balance volume.
This temporary “bang” style softens your features and adds a fun new element without the commitment of scissors. It’s an easy way to frame your face while playing with proportions.
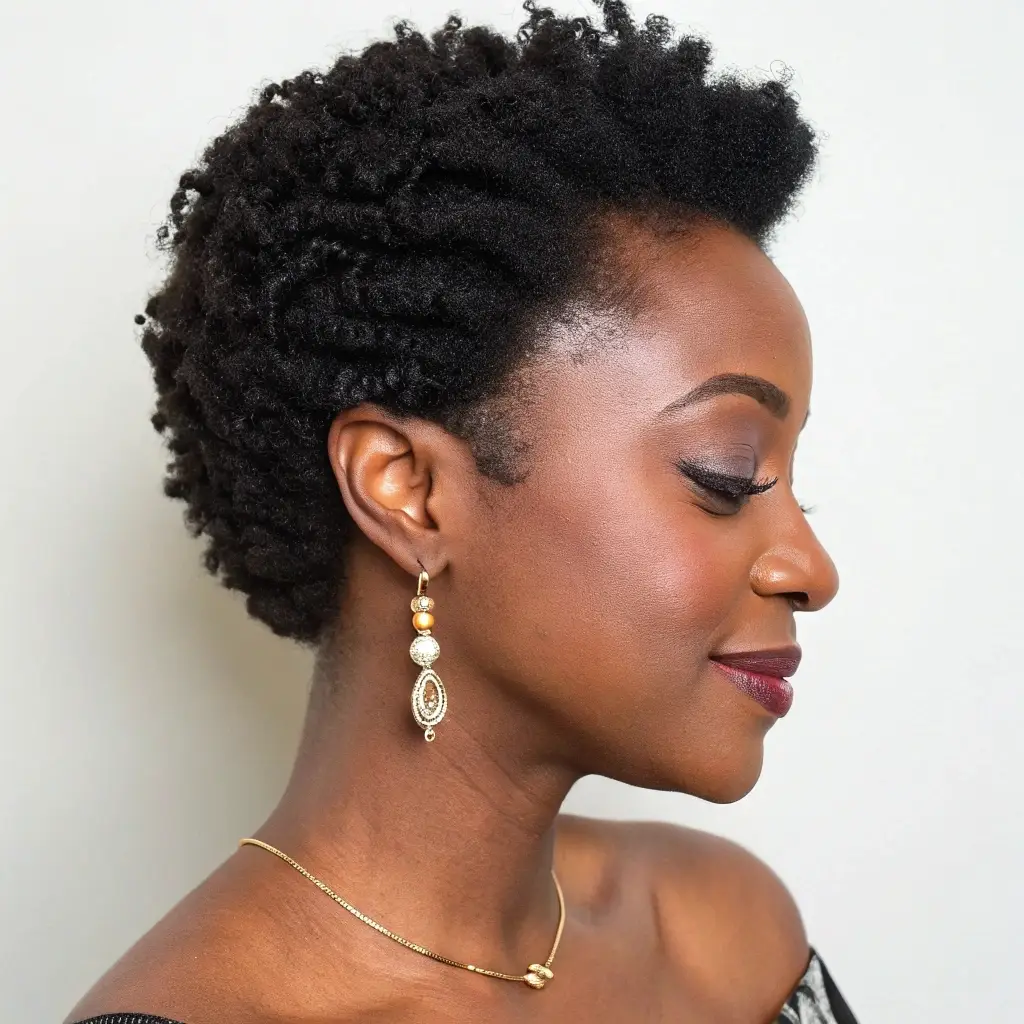
11. Twist-Out with Shaved Sides

Highlight the contrast between curls and closely cropped sides by combining a twist-out with a tapered or shaved cut.
Start by twisting only the top and back of your hair, skipping the shaved areas. Once dry, take your time unraveling each twist to preserve curl shape.
Fluff the roots for volume and let the defined curls cascade over the shorter sides. This edgy look blends texture with boldness and doesn’t require much styling time.
It’s also easy to maintain, since you won’t be twisting your whole head. Use a light pomade or edge control to polish the line between curls and scalp.
12. Twist-Out Puff Combo

The twist-out puff is a clever way to refresh a style that’s a few days old. Start by twisting all your hair and letting it dry thoroughly.
After unraveling, use a brush to gather the back and sides into a puff, leaving the crown and front loose. Secure with a soft band or puff cuff.
The contrast between the defined front curls and the smooth puff gives the style structure and energy.
This look is especially handy when the lower layers have frizzed out but your top curls still look fresh. It’s practical and cute, all while keeping your hair off your neck.
13. Shoulder-Skimming Elongated Twist-Out
Want a longer look without heat? Try stretching your hair slightly before twisting. Use the banding method or tension blow-dry on low heat to gently extend your hair.
Then apply product and twist as normal. Once dry, unravel and separate minimally to keep the curls defined.
This method elongates your twist-out while still preserving your curl pattern. The result is a drapey, shoulder-grazing finish that shows off length and shape.
It’s a subtle tweak with a big impact. Use a light oil or gloss spray to add shine without weighing down the style.
14. Layered Twist-Out Effect
Create visual interest by playing with twist size and placement. Use smaller twists at the crown and hairline and larger ones at the back and sides.
Once dry, unravel gently to reveal a naturally layered look. This method adds bounce at the top and a fuller shape all around.
You won’t need scissors or a haircut—just strategic twisting. It gives a lifted appearance and flatters most face shapes.
Refresh the layers midweek by re-twisting only the top for added shape. Great for giving life to hair that’s feeling flat or shapeless.
15. Twist-Out on Blown-Out Hair

Stretching your hair with a blow dryer before twisting creates a smoother, more elongated twist-out.
Use low heat and a heat protectant, then twist while the hair is warm but dry. Add a curl-defining cream to each section for grip.
Let it set overnight and take your time with the takedown. The curls will be looser, shinier, and hold a sleeker shape than twist-outs on damp hair.
This method is helpful for showing length or for a more structured, less fluffy look. Keep it moisturized during the week with a light mist or leave-in spray.
16. Zig-Zag Part Twist-Out

A zig-zag part adds unexpected detail to an otherwise simple style. Before twisting, part your hair in a zig-zag using a rat-tail comb. Twist each section with curl cream or gel, making sure not to disturb the pattern.
After drying, take down the twists gently. The zig-zag part remains visible, giving your scalp some personality and flair.
This tweak makes a big impact without changing the technique. Use edge control to keep the part crisp and neat. It’s a subtle way to turn a regular twist-out into something special.
17. Twist-Out Faux Tapered Look

Mimic a tapered cut by varying your twist sizes. Use smaller twists at the back and sides, gradually increasing in size as you move toward the crown.
Once dry, unravel and shape with your fingers to create a fuller top and slimmer sides. This builds the illusion of a tapered cut without trimming a thing.
It’s ideal for medium-length natural hair and allows for quick styling changes throughout the week. The shape flatters the jawline and cheekbones, giving the whole style a defined, sculpted feel.
18. Twist-Out with Color Pop

Adding temporary color highlights can bring your twist-out to life. Focus on the ends or a few bold strands using colored wax, chalk, or rinse-out dyes.
After twisting, the color will peek through the curls and create contrast. Once dry, the color adds depth and draws attention to your curl pattern.
This is a great way to experiment without commitment. Use moisturizing products to keep both the texture and color looking fresh. It’s especially striking in sunlight or under flash photography.
19. Wet Set Twist-Out Shine
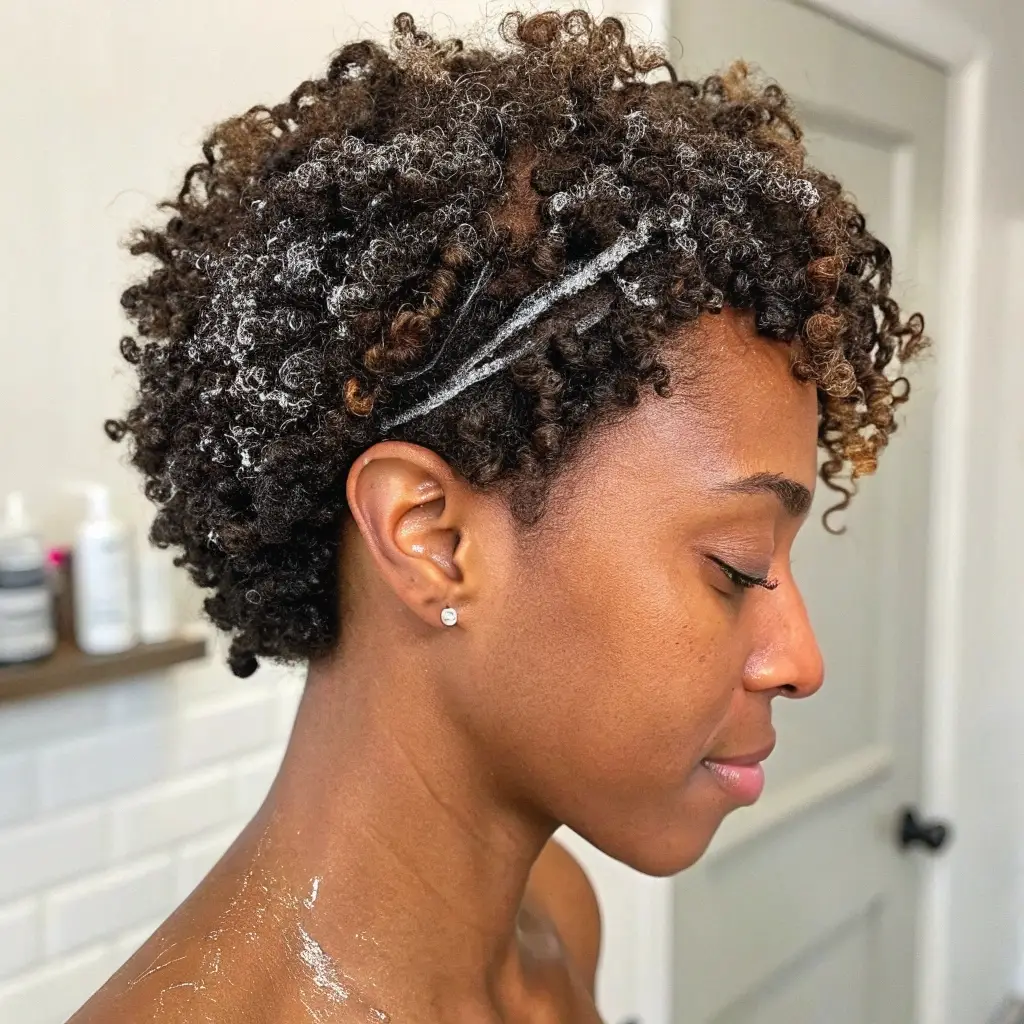
Styling your twist-out on soaking wet hair helps lock in moisture and increase shine. Start by washing your hair and applying a foam or light gel while it’s still dripping.
Work quickly to twist in small sections. The setting foam holds curls in place without flaking. Let the twists air dry fully or use a hooded dryer.
Once dry, the curls will have a firm, glossy finish. This version of the twist-out is especially useful in warm weather or humid climates where heavy creams can feel too thick.